Statement
In 2013, I started searching for my perfect home. It turned out to be a state of mind rather than a place. To illustrate this state of mind I chose the snail shell because like the snail, we carry it with us all the time. Because perfection is something relative to the person reflecting on it, I chose an atypical snail shell to create a visual of the perfect home. This shell belongs to a scaliform variant of the garden snail. A scaliform shell is a shell that instead of having the whorls tightly coiled has space between them. Although, my perfect home is represented by a different scaliform snail, this garden variety helped me give life to an entire world: from friends, to lovers, to an entire family. When I created the family I was playing with different dimensions, which resulted in lighter objects, empty on the inside, that I could turn into lamps. Since the family
should be the light in anyone’s life, I thought this was a fortunate alignment of events. But what if an entire community would be lighted?
A community is a group of people that belong together for different reasons: they live in the same area, work in the same area/ field, like the same things and meet to enjoy them together. Those people hold a influence on each other even if they don’t realize it. Sometimes just walking by someone can change that person’s life. 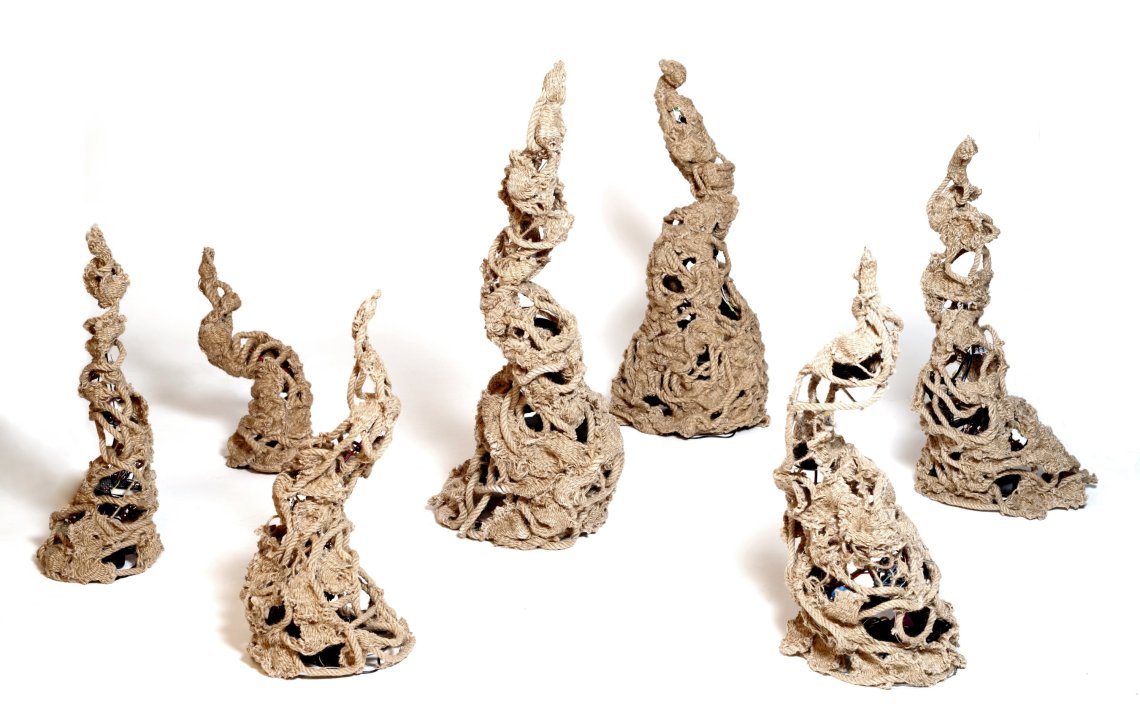
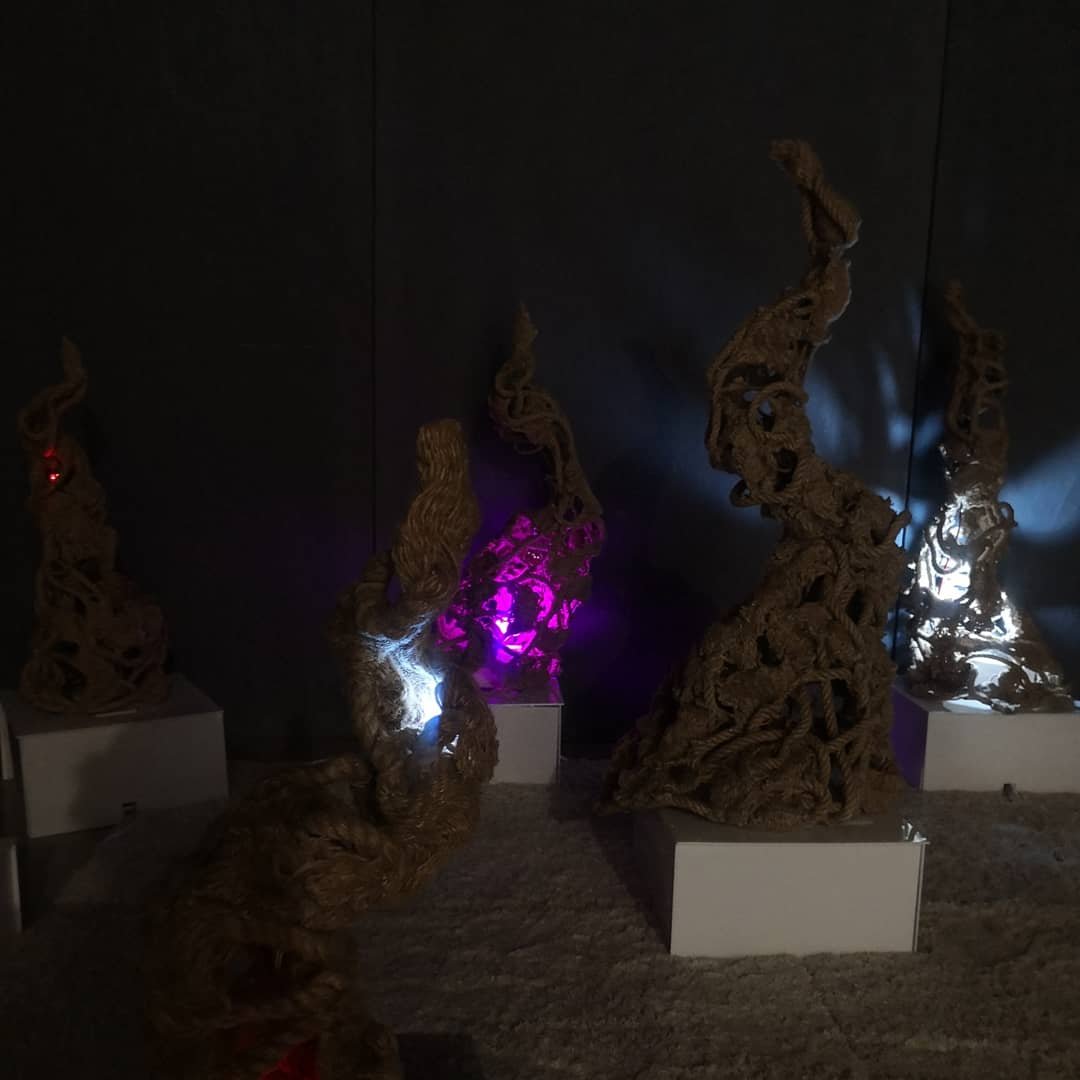
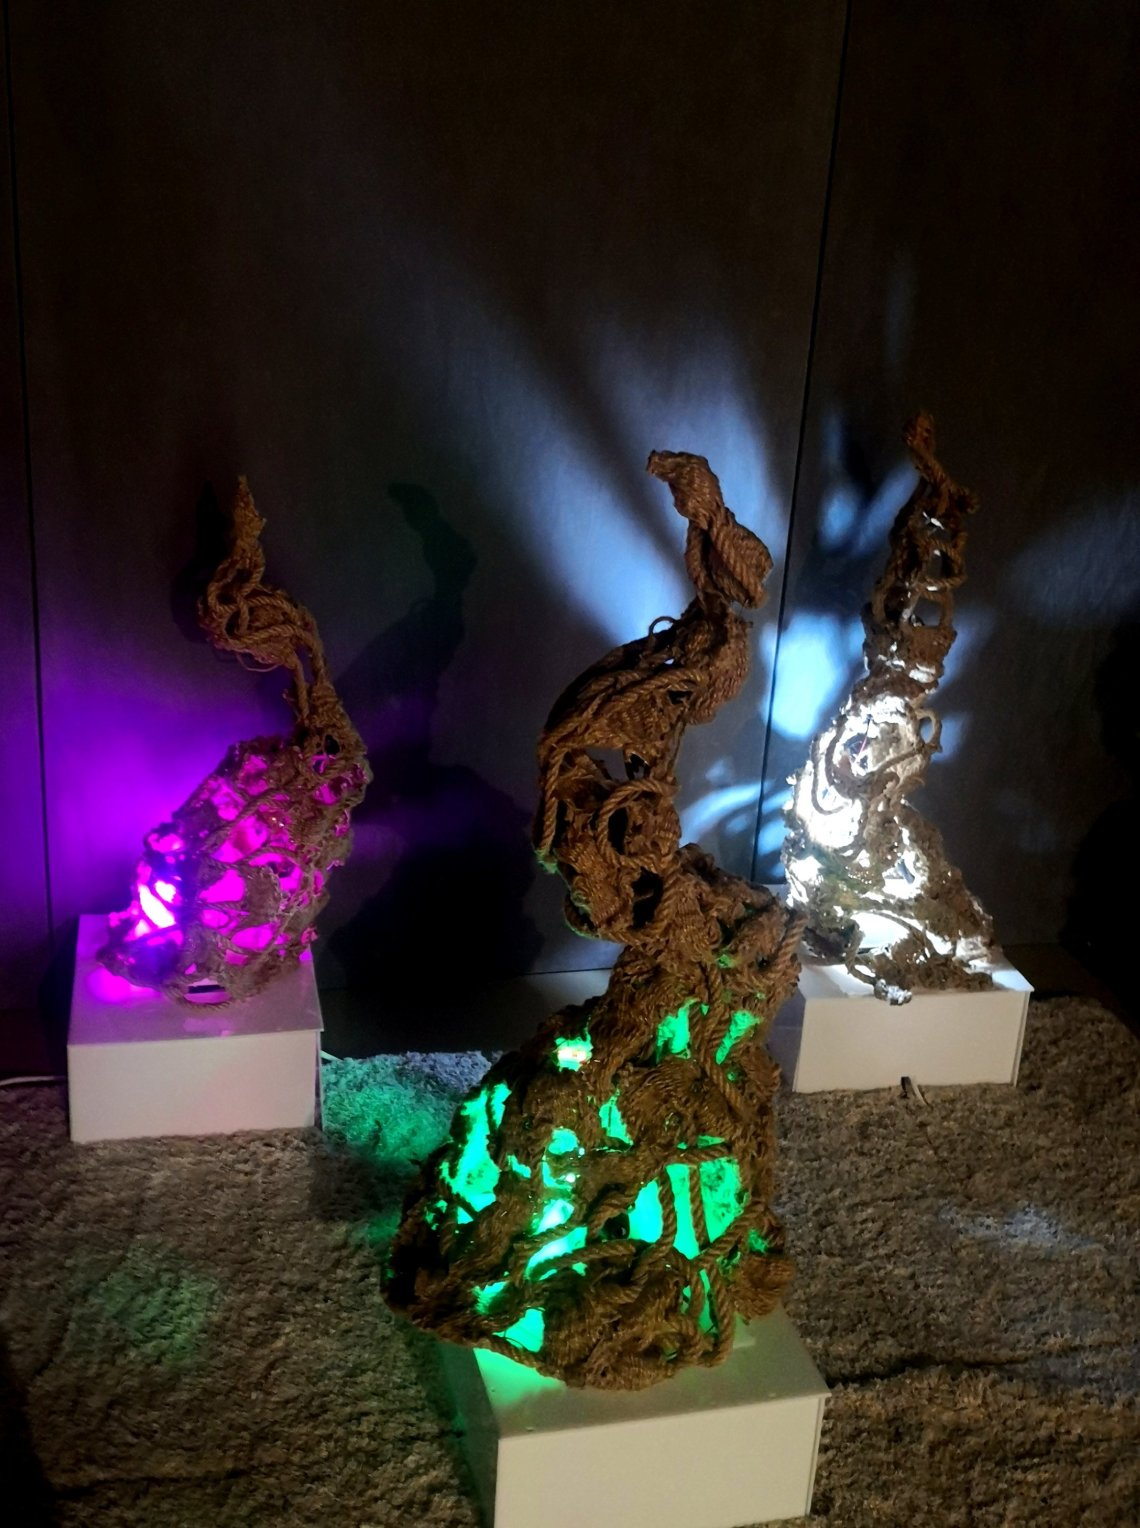
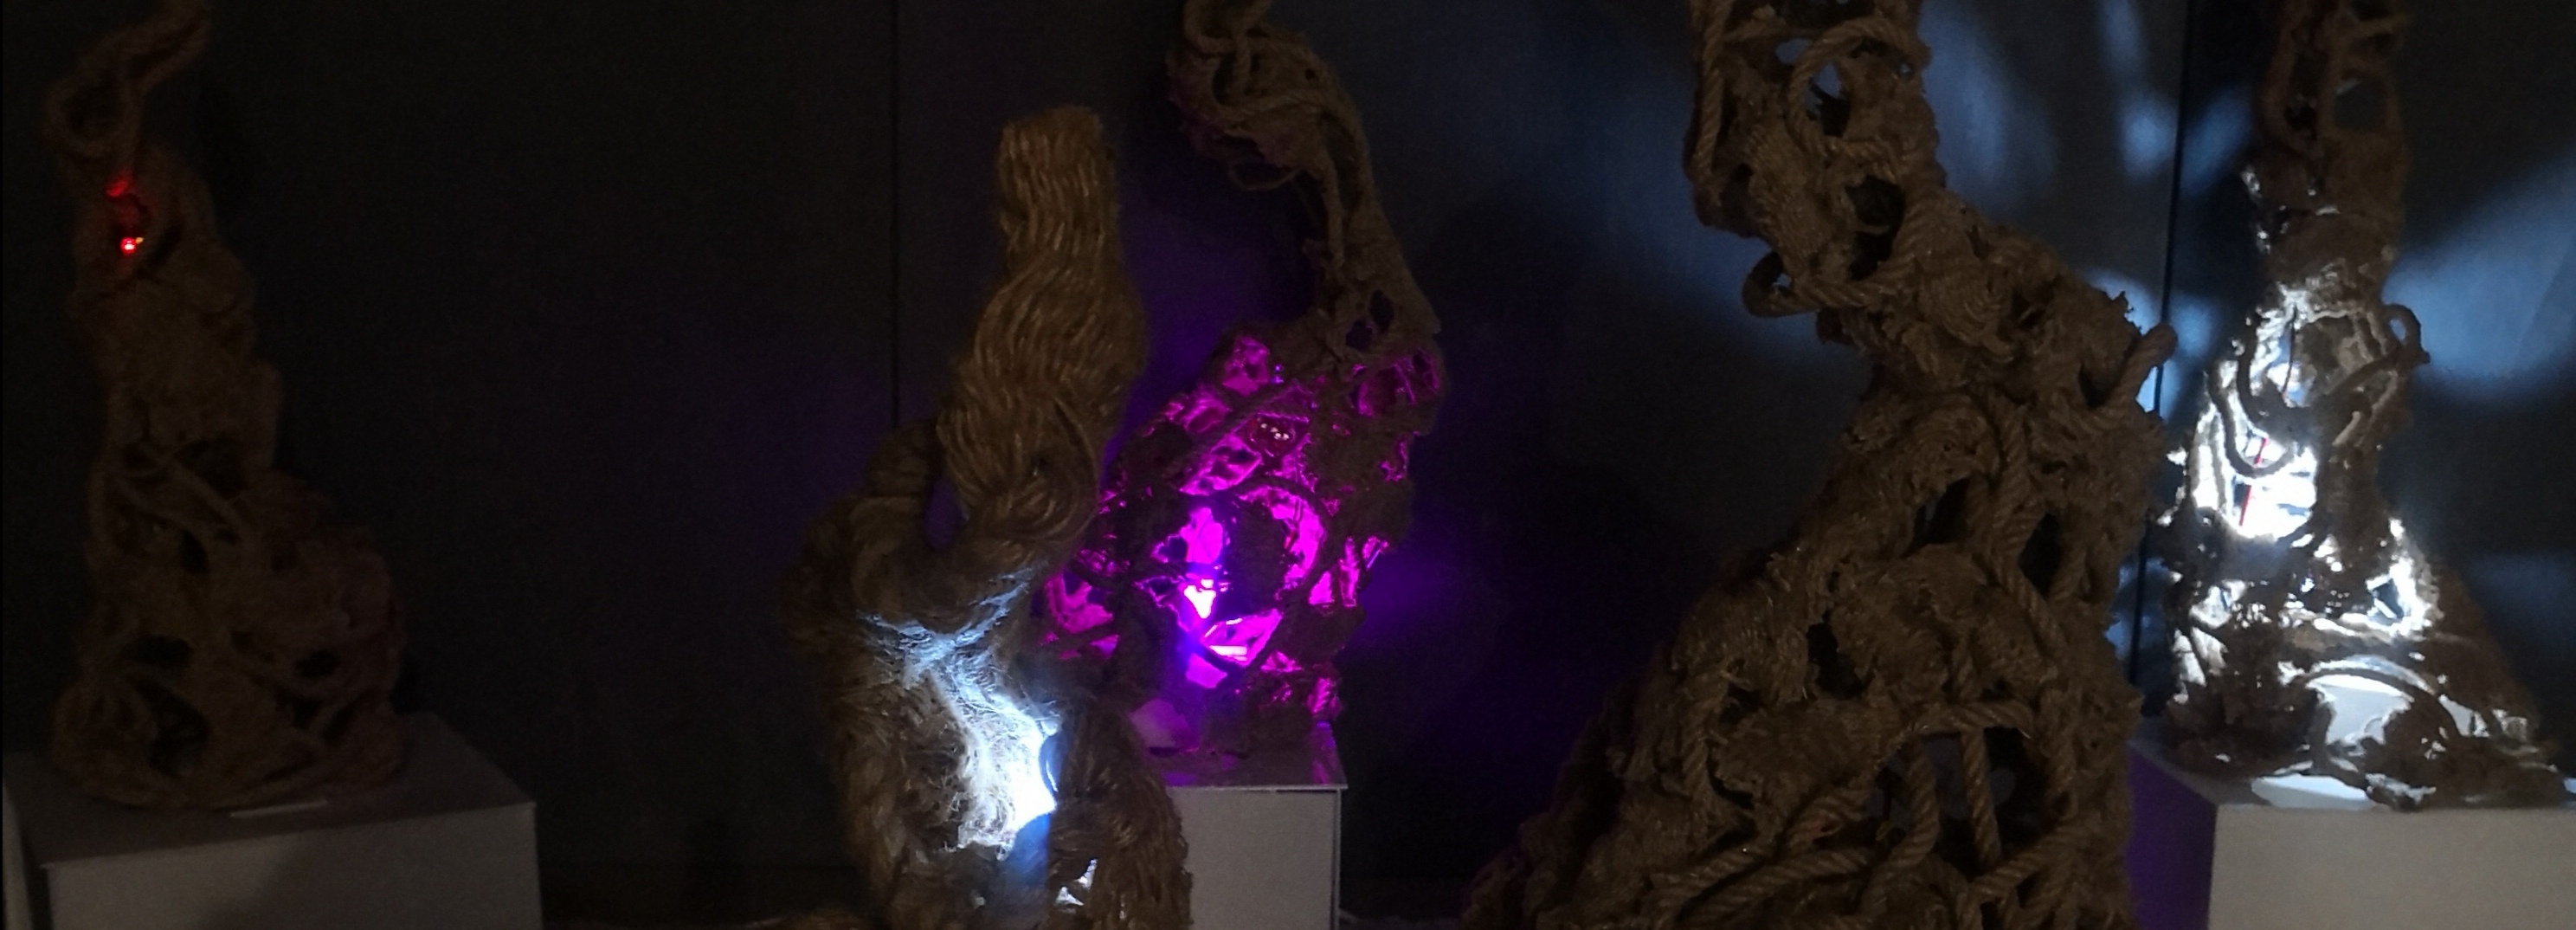
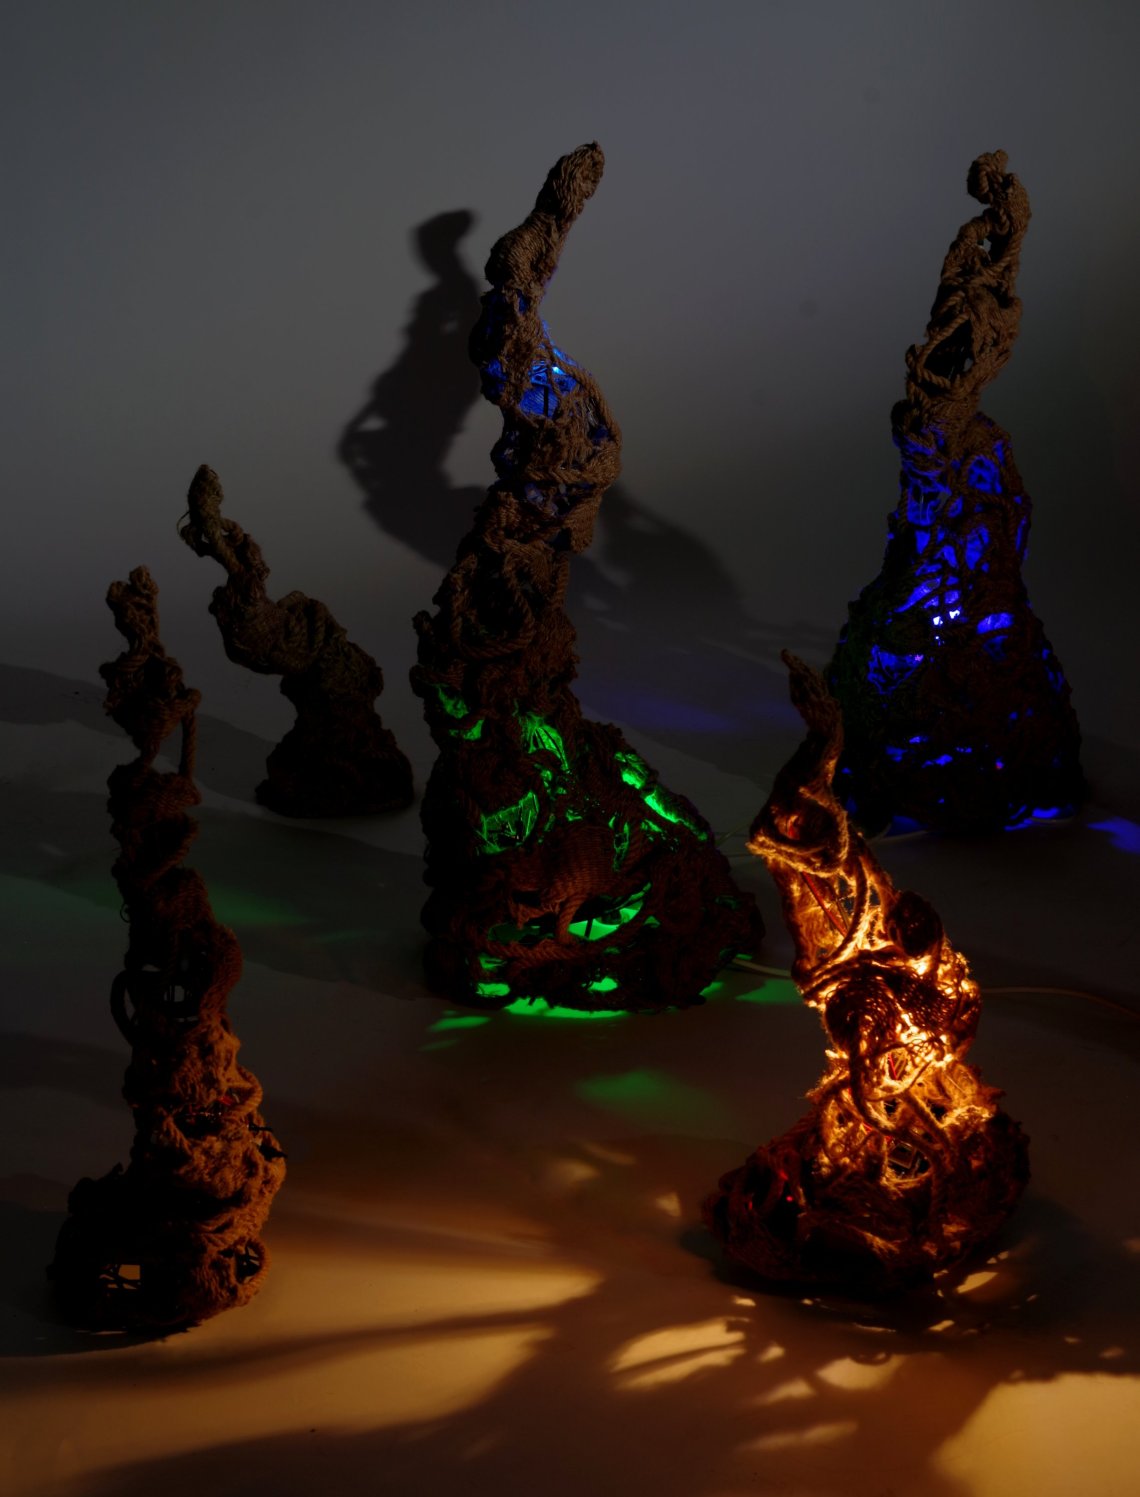
Community Lights is an installation composed of seven objects made of netted rope. As people walk around the assembly, they will change the state of the objects from lighted to turned off and vice versa, unintentionally, just by passing by. The viewers pick who shines and who doesn’t, but it is not a deliberate choice. The installation is meant
to draw attention on how simple actions can affect the environment and people around us without us realizing it. The information is transmitted to the objects from sensors placed around the gallery through a wireless connection. This way there will be no wires involved that would tip off the guests to where the sensors are and that would have to be masked. Each sensor is connected to a different object. When people chose to go in a certain part of the room will light one object and not another. What’s more, an object will light differently depending on how far people are from the sensor. It is possible that more sensors are connected to the same object and light it differently based on where people stand.
Technical specifications:
The electric circuit:
Two years ago I started experimenting with electric circuits. I turned two of the objects done for the project The perfect home into lamps. Previously, I worked as product designer and made lamps, although, at the time, I did not do the electric circuit. However, I saw how it’s done. Later, I took apart lamps to see how the components are connected. Soon after I started my own experiments, I realized that a classic electric circuit wouldn’t be good because it would involve wires and they would tip the viewers to where the sensors were. Hiding the wires was a second option, but it is very restrictive.Last year, I decided to use my background in programming and create the circuit of the installation with micro-controllers. This would allow me to create a wireless circuit because the sensor and the micro-controller could communicate through WiFi or radio wavelength. Also, one micro-controller can communicate with different sensors and light the object in a different ways depending on which sensor sends the information.
Moreover, if two sensors send information at the same time to the same object, only one may produce changes to it. This way, even if a guest is in a favorable place for the object, if a different sensor was activated first, the object may not be lighted at its full capacity, underlying the importance of good timing.
In short, micro-controllers allow the installation to be as simple or as complex as I want it.
Although at first I thought the micro-controllers will have to communicate through WiFi, that isn’t necessary. Radio-wavelength communication is very effective in closed spaces, even if the sensor and the object are in different rooms. The transmitter will be connected to one or more sensors, a micro-controller and an external 5V battery that can be recharged through USB. The circuit will be enclosed in a box no bigger than 5 x 5 x 5 cm. The box will be custom made to allow the sensors to have direct contact with the
environment. Depending on which sensors I use, if someone passes by or talks around the transmitter, it will send the information to the receiver.
The receiver is connected to the micro-controller inside the lamp and it will light up a certain bulb depending on the information it receives. This way, a lamp can be lighted more or less depending on which information it receives (which sensor was triggered) or even the intensity of the signal (how loud people talk, how dark is the shadow they cast over the sensor, how fast they pass by etc.). If the sensor and transmitter are in the same room, in some cases, like laser or IR light, there is no need for either Wi-Fi or radio wavelength communication. For instance, I can have an IR sensor on the lamp and somewhere in the room, in the direction of that sensor, I will place the IR transmitter (a small IR LED connected to an ATtiny45 and a 5V battery which will keep it on, enclosed in a 5 x 4 x 3 cm box with a small hole for the LED). IR light cannot be seen by the human eye, so it will not be noticed by the visitors. However, the light will reach the sensor as
long as no one is in the way. If a visitor passes between the sensor and IR LED, the micro-
controller in the lamp to which the sensor is connected will know an obstacle is in the way and will light up the bulb in the lamp. The bulbs will be LEDs of either 12V or 220V. The 12V LEDs will be connected to the rest of the circuit that runs at 5V through voltage regulators. The 220V will be connected to the 5V circuit through relays. The charger for the lamps is the charger of the Arduino Uno micro-controller.
The code:
After reading a few books and following some guidelines, I realized that there is no recipe for an installation like this, I would have to create my own code from scratch. This turned out to be more exciting than I expected, since I was never really fond of this activity or of working on the computer. I guess finding a use to make my ideas come to life gave it the charm it needed. I always loved art that interacted with the viewers and envied those who could create it. Realizing I can do just that, I started creating little pieces of code to make LEDs or motors react to the environment. I even created a circuit and wrote a code from scratch. The final circuit which had all the components soldered isn’t included as it was not part of the scope of the tutorial.
The textile objects:
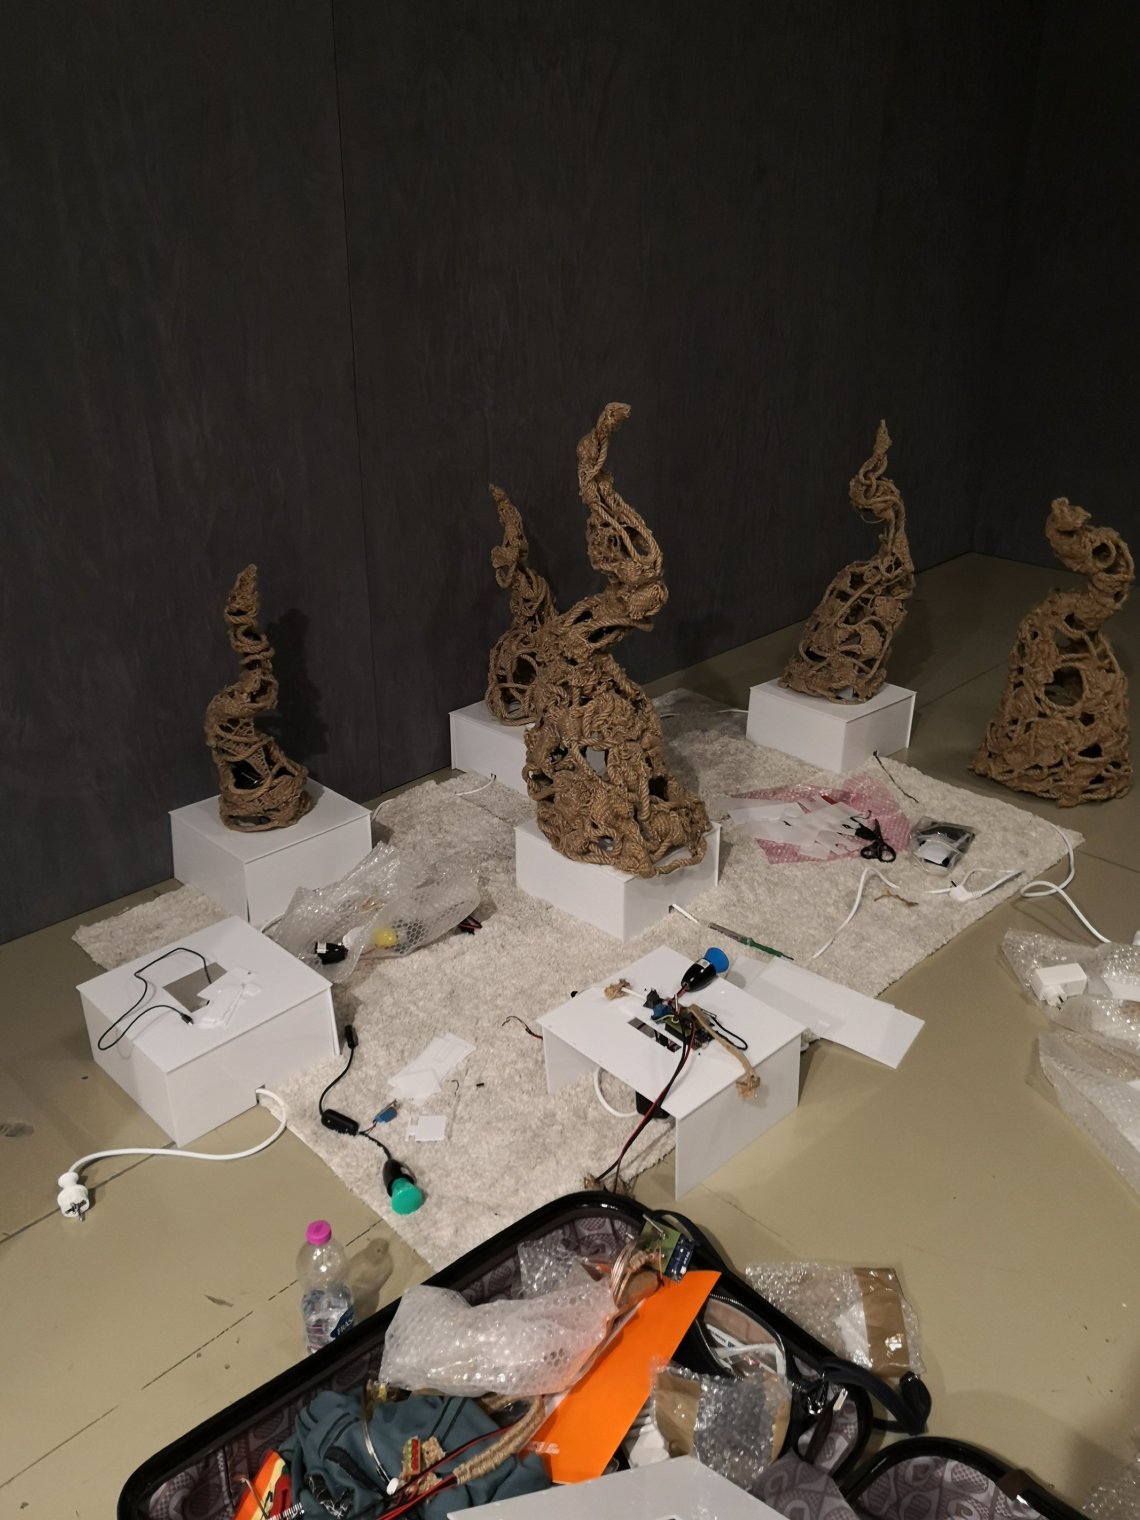
To create the objects I use three papier-maché molds of different sizes. I am netting the rope and placing it on the mold. After the mold is completely covered, I place wire through the rope to ensure that it keeps it in the desired shape. When this is done, I take the rope off the mold. Depending on how I construct the wire and rope structure, the
objects look different and have different sizes. This way I ensure that even if they are similar, no two are identical. Furthermore, the style of netting insures that the surface of the objects is unique. The stands of the objects are made of wood treated with
fire retardant varnish. There are five objects of approximately 20 x 20 x 50 cm, three of 27 x 27 x 75 cm, two of 35 x 35 x 100 cm and one of 45 x 45 x 130 cm. The installation can be composed of all the objects or fewer depending on the space allocated. The objects have a space on the base that allows the electrical extension and chargers to be concealed from view. The circuits are secured inside the lamps on wood stands treated with fire retardant varnish and tied to the lamp with rope and wire. The main circuit with the receiver is placed on the middle of the base coil.

Installation:
All the lamps are arranged in the same place, preferably in a way that allows visitors to walk around the installation. I envisioned the arrangement in a spiral because of the snail shell inspiration, but the objects can be placed according to space and momentary inspiration. Their different sizes allows to create various dynamic assemblages. I will be present and able to install it myself. The chargers are at the base of each object. There will be seven extensions with two outlets. The first one will be plugged into the wall outlet and will go to either the first or the last object in the spiral (or of the different arrangement, if it is the case). In one of the outlets will be plugged the lamp, in the other outlet will be plugged the second extension that will go to the second object. In on of the outlets of this extension will be plugged the second lam and it the other outlet will be plugged the third extension that will go to the third object and so on until the last
one. The last extension can have only one outlet since it will not have another extension to be plugged in it, only the last lamp. The only wires that will show will be the main one from the outlet to the installation and the ones from each extension to the next. These wires will be white.
Community lights at Florence Biennale 2019